XP1 vs XP2 vs D3: which MMC drift chassis should you build?
Suspension, drivetrain, adjustability and shopping list of the three printable MMC RC drift chassis, side by side, to help you pick the right one.
Published 22 October 2026
All three MMC chassis are 1:10 RWD drift cars you print at home and finish with standard RC hardware. None of them needs custom CNC-machined parts: every part is either printed or bought off the shelf. All three are belt-driven (S3M or HTD3M belts), take 55 mm dampers and a Rhino C-LSD, Yokomo YD-2 or RDX spool, print in PLA and PLA-CF and need a 220 mm print bed. What changes is how the suspension works, how much you can adjust, and what you have to buy.
This comparison uses the figures from the official build manuals (XP2 V1.1.1, XP1 V1.5.1, D3 V1.0).
The short answer
- XP1 if you want a proven first build. It has been through five manual revisions, has the shortest shopping list of the three and the most step-by-step pictures (41 steps).
- XP2 if you want the most advanced suspension and the aero options. It has a double wishbone rear with three dampers, a flex slider to tune chassis roll and a full ground-effect aero kit.
- D3 if you like to tune. Wheelbase, motor position, camber, caster, toe, Ackerman and track width are all adjustable, and it uses turnbuckles from the start.
Side by side
| XP1 | XP2 | D3 | |
|---|---|---|---|
| Front suspension | Double wishbone, mono-shock | Double wishbone, mono-shock | Double wishbone, one damper per side |
| Rear suspension | Multi-link | Double wishbone, triple shock | Multi-link |
| Dampers | 3 × 55 mm | 4 × 55 mm | 55 mm, 2 at the front |
| Drivetrain | 3 belts, S3M or HTD3M | 3 belts, S3M or HTD3M | 3 belts, S3M or HTD3M |
| Differential | Rhino C-LSD, Yokomo YD-2 or RDX spool | Rhino C-LSD, Yokomo YD-2 or RDX spool | Rhino C-LSD, Yokomo YD-2 or RDX spool |
| Rear axles | Yokomo 47 mm | Yokomo 47/49 mm | Yokomo 49 mm |
| Control arms | Printed, swappable for turnbuckles | Printed, swappable for turnbuckles | Turnbuckles (14) |
| Wheelbase | 256 mm, fixed | 256 mm, fixed | 240–273 mm, adjustable |
| Min. print bed | 220 mm | 220 mm | 220 mm |
| Threaded inserts | 85 | 97 | 96 |
| Ball bearings | 19 | 26 | 15 |
| Assembly guide | 41 illustrated steps | 37 illustrated steps | Interactive 3D PDF |
All three use a standard 540 motor with a 14T pinion pressed into a printed pulley, a low-profile servo and Yokomo front axles.
Printing
The three chassis print the same way:
- Material. Any PLA works for the visible parts (the colour parts in the manuals); PLA+ gives them extra strength. The prototypes use PLA-CF for the structural parts.
- Print bed. 220 × 220 mm is the minimum for all three. The XP1 and XP2 decks fit right at the limit.
- Orientation and infill. Print every part as flat as possible, some need supports. Prioritise quality and use at least 15 to 20% triangular infill.
MMC XP1: the proven one
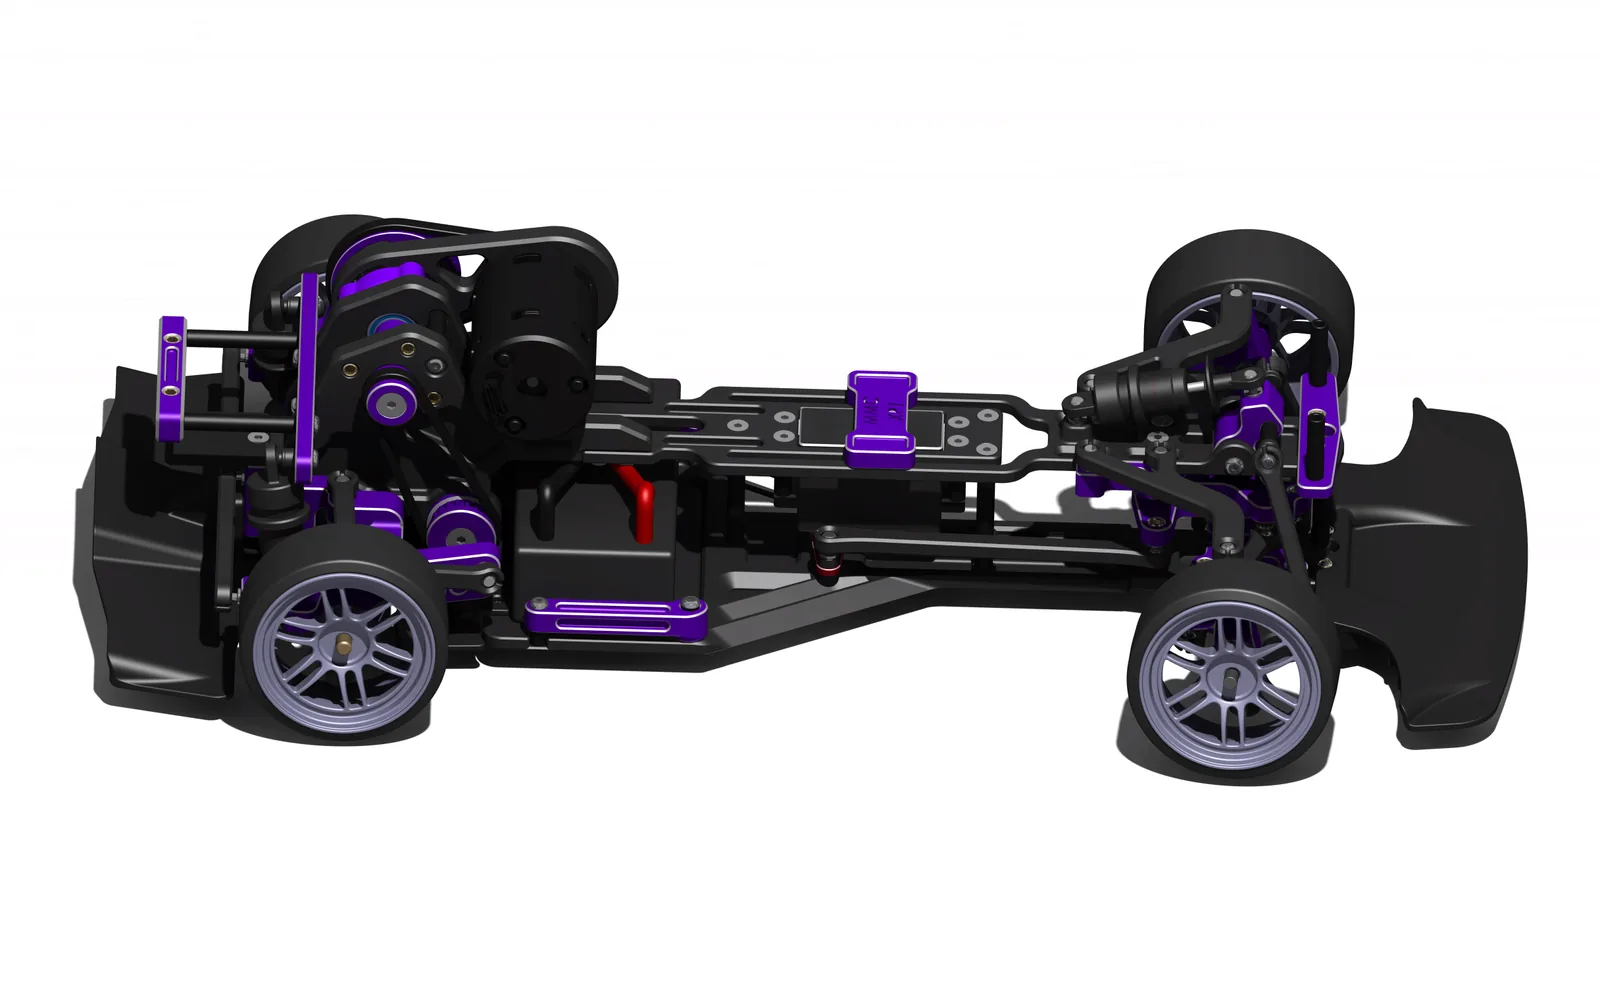
The XP1 is the chassis with the most revisions: the manual went from V1.0 to V1.5.1 with a reworked flex system, steering, wheelbase and belt tension fixes, new balljoints, an ESC support and RDX spool compatibility.
Suspension. The front is a double wishbone with a single central damper (mono-shock). It stiffens front roll like a sway bar, which gives more front grip: the more the rear rolls, the more grip you get at the front. The rear is a multi-link, which can be adjusted almost without limit once you swap the fixed-length rods for turnbuckles.
Why pick it. Three dampers instead of four, fewer bearings, inserts and balljoints than the XP2, and printed control arms that already give you a good starting alignment. It has the shortest shopping list of the three.
Upgrades. Adjustable front upper and lower arms, a front splitter, a top adjustable flex regulation and an undertray with diffusers.
MMC XP2: the advanced one
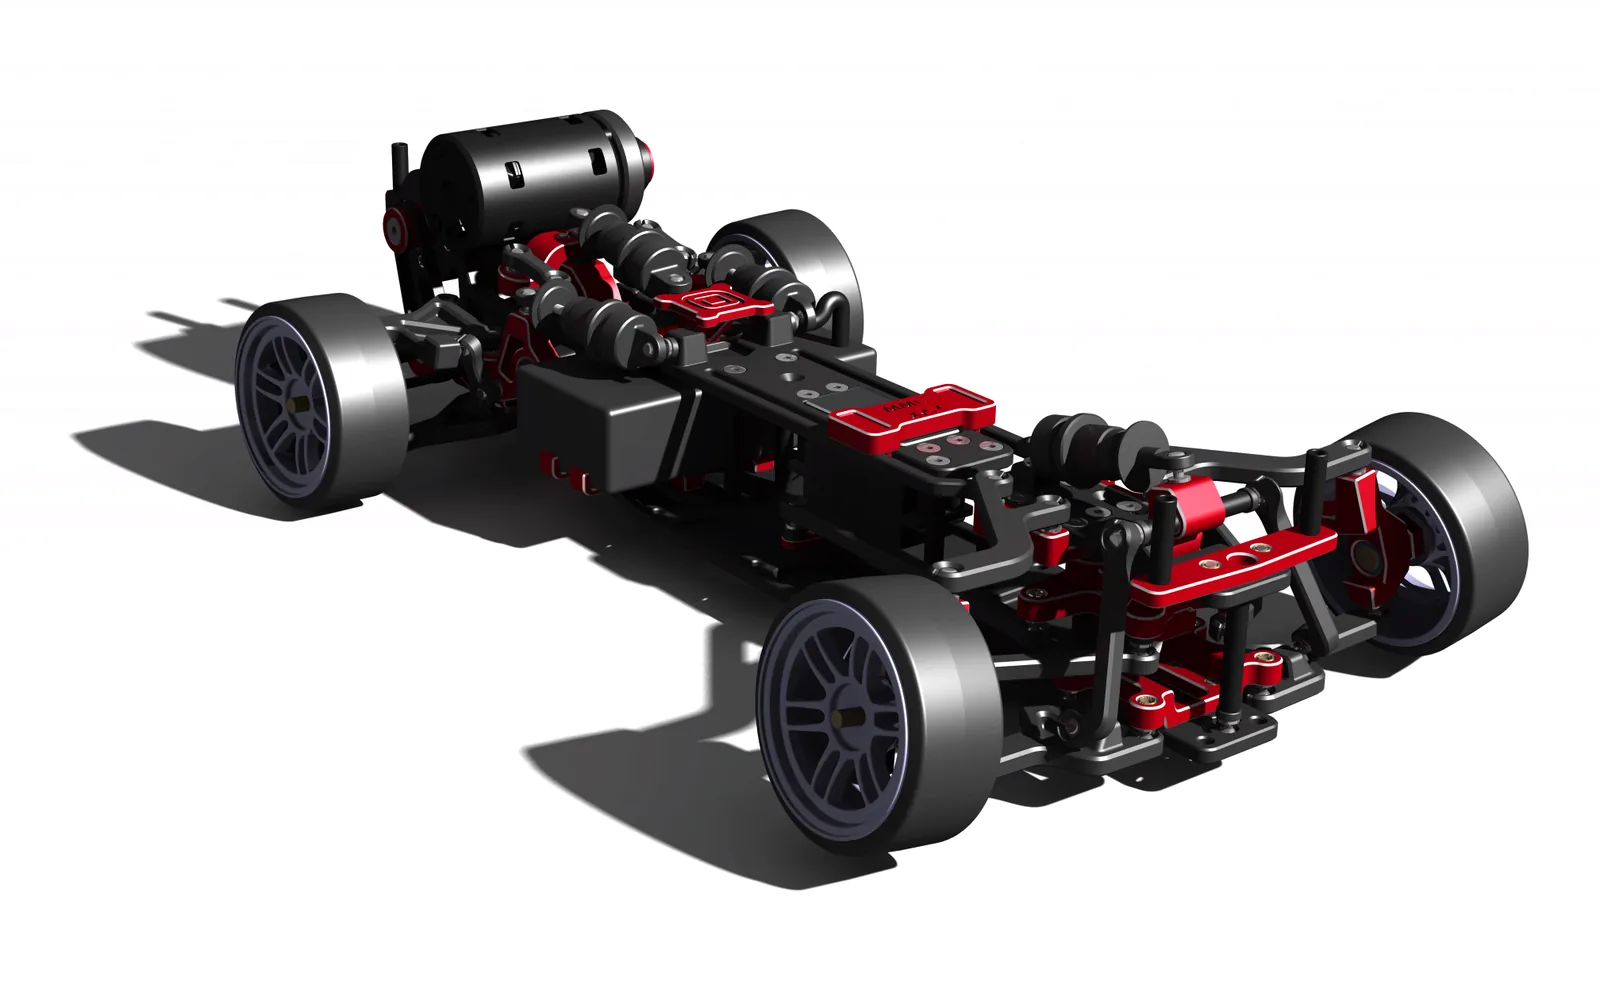
The XP2 keeps the front end of the XP1 and changes the rear: a double wishbone with three dampers instead of the XP1’s multi-link with two, and a flex slider in the middle of the chassis.
Suspension. The flex slider works as an anti-roll bar. Moved forward, the chassis gets stiffer and the rear roll is transferred to the front. Moved back, the chassis flex absorbs the rear roll, so the front is freer. It is one of the quickest ways to change how the car turns in without touching the dampers.
Why pick it. It has the most to tune in the suspension and it is the base for the most upgrades, including the ground-effect aero kit.
Upgrades. A full ground-effect aero kit (front splitter, side venturi tunnels and rear diffuser, also sold separately), adjustable front and rear control arms and the top adjustable flex regulation.
MMC D3: the adjustable one
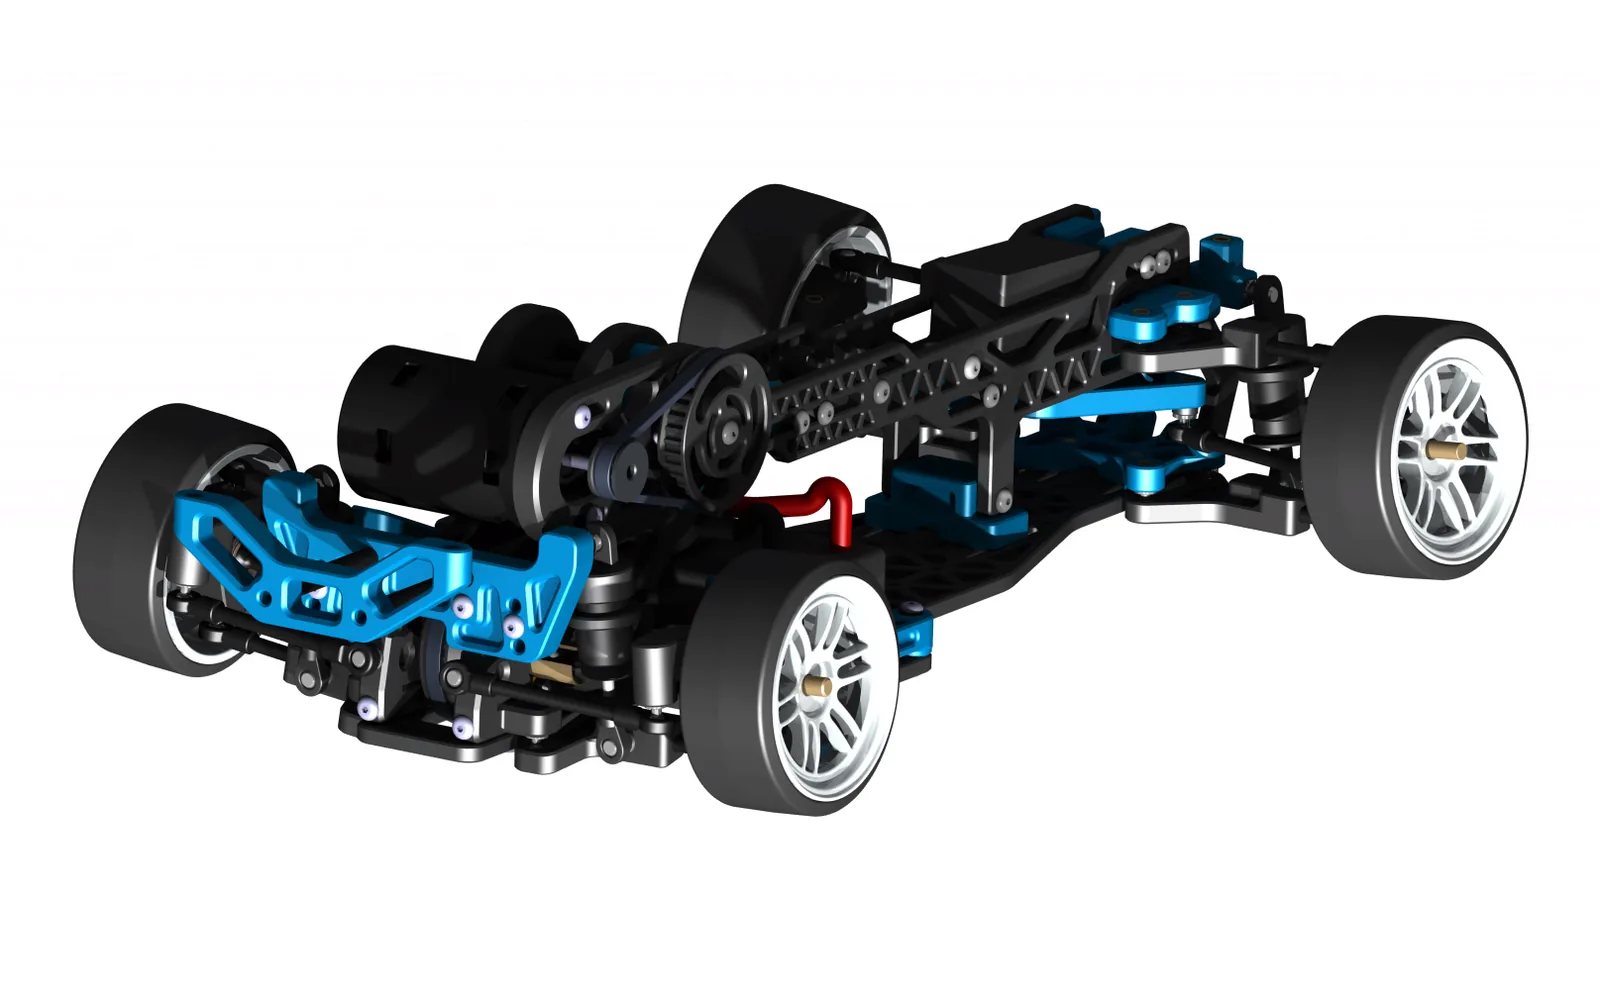
The D3 was designed for drivers who like to build and modify, with a balance that works across every discipline of RC drift.
Adjustment. The wheelbase goes from 240 to 273 mm, and moving the motor shifts the centre of gravity. Unlike the XP1 and XP2, the front has one damper on each wishbone instead of a central mono-shock. The front double wishbone adjusts track width, camber, caster, Ackerman and toe. The rear multi-link adjusts track width, camber, caster, toe and has several arm mounting positions.
Why pick it. If you enjoy setup work, it is the chassis with the widest range. It uses turnbuckles from the start, so the alignment is fully yours.
Upgrades. A conversion for a higher centre of gravity (HCG) and a body magnet support.
What you need besides the printed parts
Whichever chassis you choose, everything that isn’t printed is a standard part you can buy. Plan for:
- Electronics: 540 motor, ESC, low-profile servo, gyro, receiver and transmitter, and a shorty battery.
- A differential: Rhino C-LSD, Yokomo YD-2 or an RDX spool.
- Three timing belts, S3M or HTD3M (3 or 4 mm wide); the lengths are in each parts list.
- Yokomo rear axles and front axles, wheel hexes.
- 55 mm dampers.
- Brass M3 threaded inserts, M3 screws, round nuts (standoffs), 4.8 mm balljoints and bearings.
Each build guide has the full parts list with quantities and the shops linked in the manual.
Still not sure?
Watch the chassis running on the MMC Designs YouTube channel, or ask on Instagram at @mmc.drift.